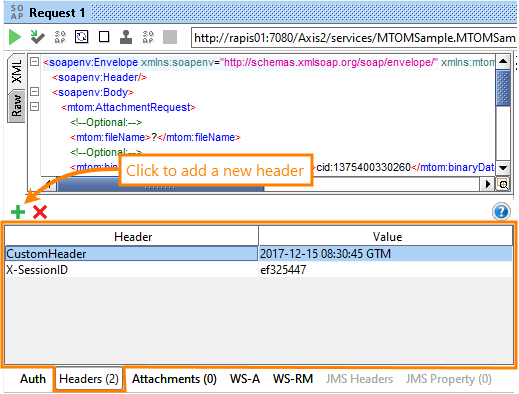
Creating custom HTTP headers in SoapUI is very straightforward. Switch to the Headers tab at the bottom of the request editor and add click  to add a new header:
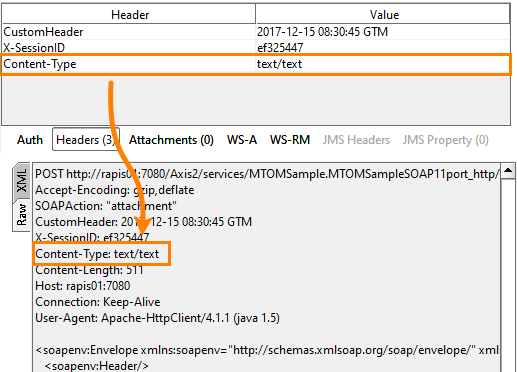
If a custom header’s name coincides with an existing standard header name, the custom header will replace the standard header in the request. For example, on the following image you can see a custom Content-Type header that overrides the standard Content-Type used for the SOAP Request (text/xml; charset=utf-8):
You can add as many headers as you woud like, and their value can contain property expansions.
To view response headers, use the Headers tab of the response part:
