This page contains information on standalone SoapUI Pro that has been replaced with ReadyAPI.
To try enhanced functional testing functionality, feel free to download a ReadyAPI trial from our web site.
What is Data-Driven testing?
Quite simply put, data-driven testing is when you store test data (input, expected output, etc) in some external storage (database, spreadsheet, xml-files, etc) and then use that data iteratively in your tests when running them. For example to test your phone-lookup service, you might have a list of names and expected phone-numbers in a database which you would use to "drive" your test, checking that each name gets the right phone-number back. It's really quite simple.
Watch the video tutorial:
The step-by-step guide:
DataSource teststeps
In ReadyAPI, creating data-driven tests is really easy. A DataSource TestStep is available for reading test-data into standard ReadyAPI properties from a number of external sources (Excel files, XML properties, JDBC sources, files/directories, etc), these can then be used in following TestSteps (requests, assertions, xpath-queries, scripts, etc,) either via Property-Transfers or standard Property-Expansions. Finally follows a DataSource Loop TestStep which is configured to loop back over the previous TestSteps for each row/record in the DataSource.
What this boils down to is the following setup:
- DataSource - reads test data into properties from external source
- TestSteps (any number) - tests service functionality using the DataSource properties made available in (1)
- DataSource Loop - loops back to (2) for each row in (1)
1. Create DataSource
Ok, lets make it simple so you get the hang of things; Create an empty project and import the publicly available CurrencyConverter WSDL available at http://www.webservicex.com/CurrencyConvertor.asmx?wsdl , then add a TestSuite and a TestCase and open its editor:
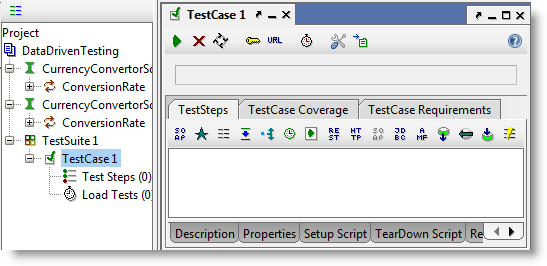
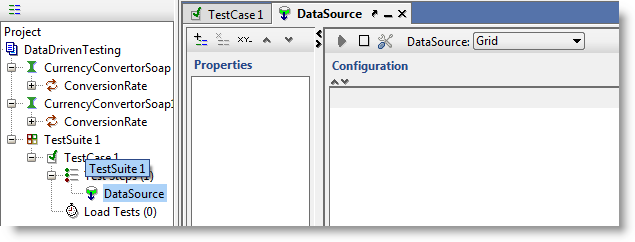
Now add a DataSource TestStep and select the Grid DataSource from the dropdown in the toolbar, which is a DataSource for managing your test data from inside SoapUI without requiring any external storage. You should now have:
Now you need to define which data your DataSource should hold. Add three properties to your DataSource: From, To and Rate (use the add button in the toolbar on top of the properties list to the left).
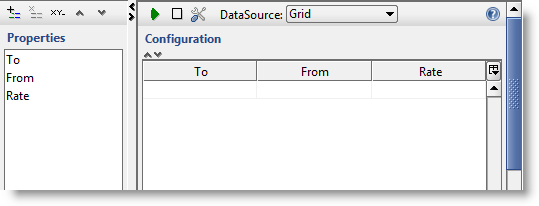
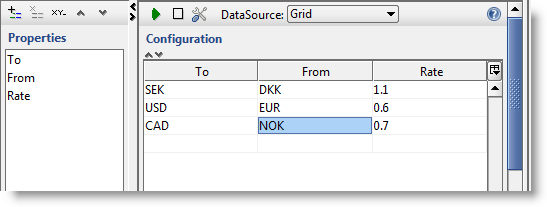
As you can see, whenever you add a property, the Grid editor to the right adds another corresponding column so now you have three columns in which you can add some test-data. Add the following data:
SEK, DKK, 1.1
USD, EUR, 0.6
CAD, NOK, 0.7
Which in the editor will be:
Ok, now you've set up the test data you are going to feed into your test, move on to..
2. Create TestSteps
Now you need to add a Test Request to your TestCase which you will use to test the Web Service. Press the SOAP Request button in the TestCase editor and select the ConversionRate operation in the CurrencyConverterSoap Interface.
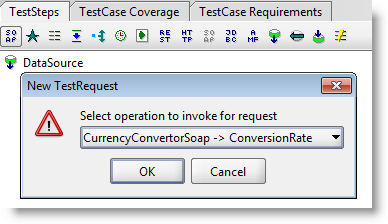
Press OK in all dialogs. A SOAP Request Step will be added to the TestCase and the editor for the request is opened. Switch to the Form editor (if not already there) and from the popup-menu of the two fields
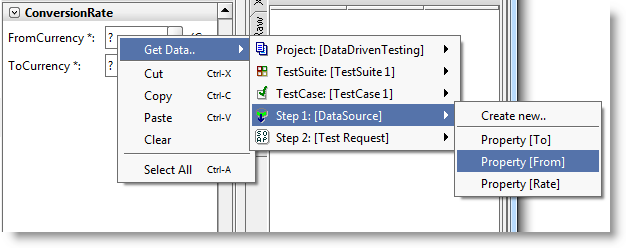
Select the corresponding properties in the DataSource. SoapUI will automatically create the corresponding property-expansion syntax in the Form Fields (here shown in the outline view for legibility).

Now you have set the request to use the data in your DataSource, next step is to also create an assertion for the response to check that you are getting the expected response back. Open the Assertions tab at the bottom of the Request editor and use the Add button in its toolbar to add an XPath Match assertion.
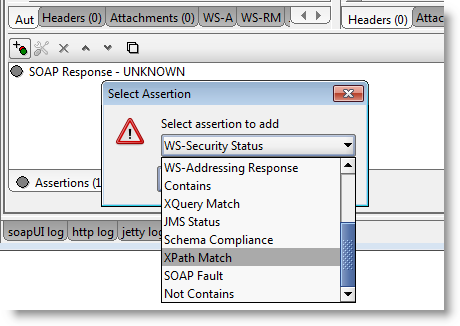
In the opened XPath Assertion editor, press the Select XPath button (top-left) to open the XPath Wizard. Since you don't have a response to select from, ReadyAPI will prompt you to use a default response instead. Do so and select the ConversionRateResult element in the popup.
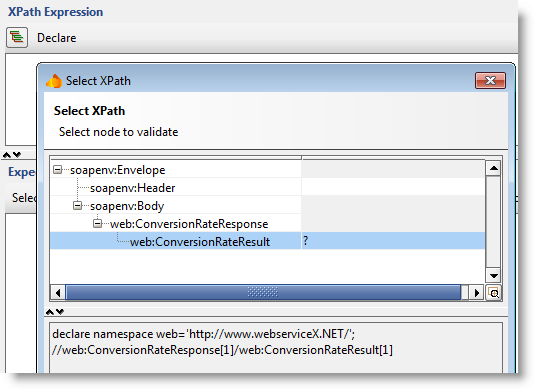
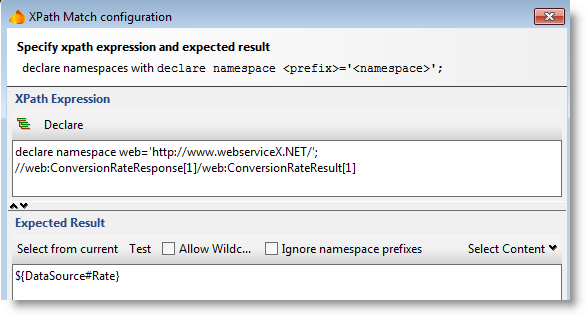
And finally, use the Select Content button (bottom right) to select the Rate property in the DataSource. The XPath assertion should now be configured as follows:
While an XPath query pointing to <myElement>Some Text</myElement> will return Some Text, a query pointing to the empty element <myElement /> will instead return <myElement />. To instead return an empty string on empty elements, surround your XPath query like this: concat( //my:XPath/query[1] ).
Almost done now, all you need to do is..
3. Add DataSource Loop
Great! The request now uses the To and From properties in the DataSource and the Assertion uses the Rate. All that is missing now is an DataSource Loop at the end of the TestCase that loops back to the Request for each row in the DataSource. Add a DataSource Loop step from the TestCase toolbar, double-click it and configure it to loop back to the Request for each row in your DataSource.
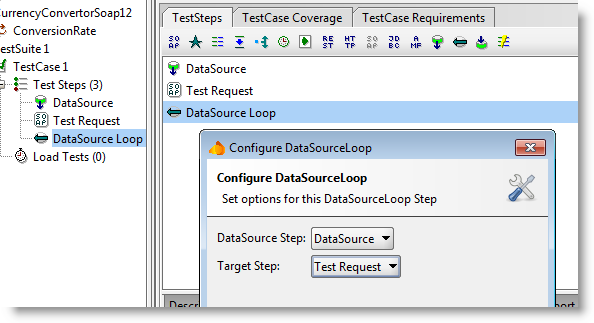
(If you hadn't done this, the request would only have gotten executed once).
All set. Now run the TestCase:
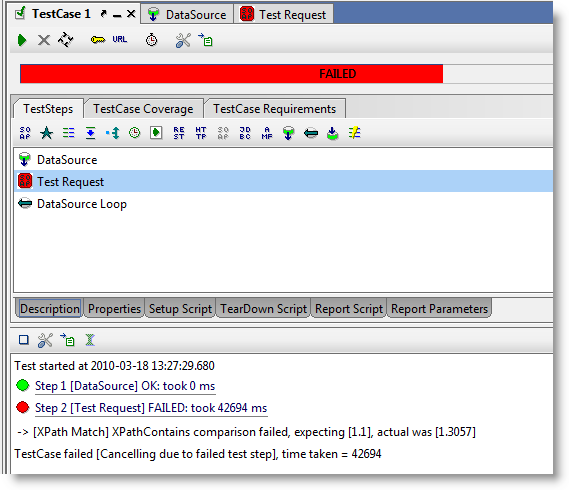
Not surprisingly you get an error from the assertion in the first run of the request. Your expected Rate was not that returned by the web-service . Double click the Failed TestStep in the TestCase log (which opens the message viewer) and select the response tab to see what was actually returned.
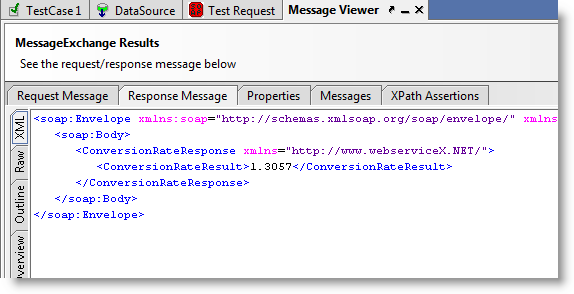
(actually you could see this in the TestCase log as well, we just wanted to show off this feature as well)
Put that value into the first row of the Grid DataSource. If you now run the TestCase, you'll get a similar error for the second row and third row (after correcting the second as you did for the first). After correcting the last row the TestCase passes.
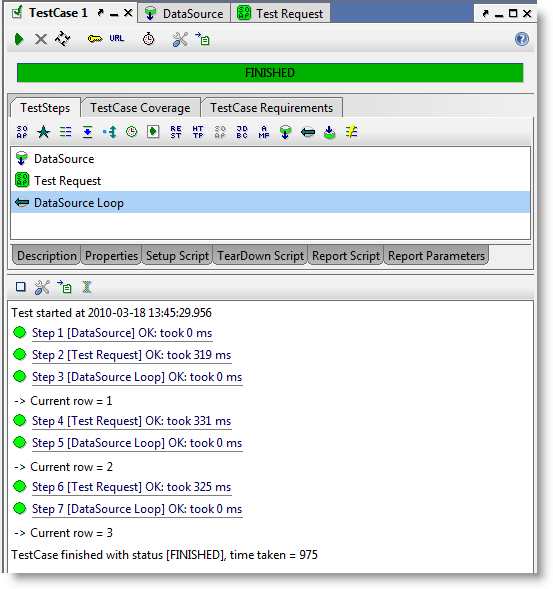
Nice! You could basically add as many rows as you wanted and SoapUI would happily chew through all of them.
Moving to Excel
Now use an Excel spreadsheet instead of your DataGrid. Go back to the DataSource and select Excel from the dropdown at the top.
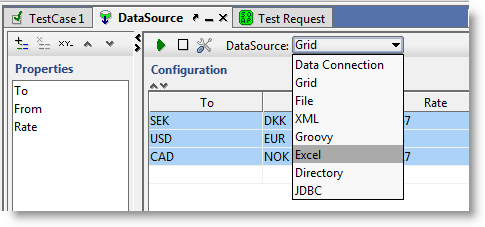
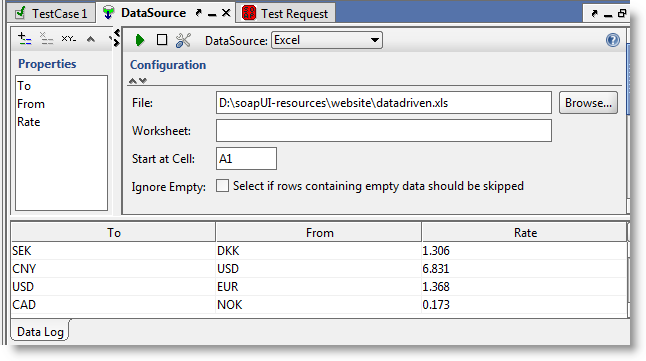
Now the configuration looks as follows:
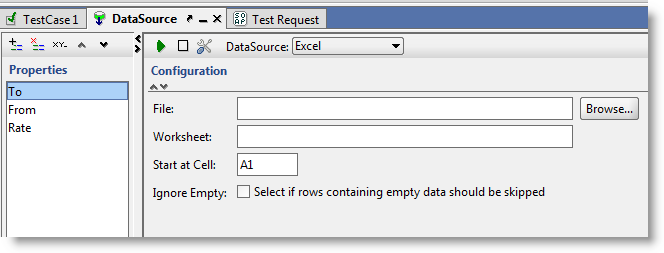
Create an spreadsheet in any program that can save XLS files and save it as such with the same values as you had (actually you should do this first before changing the DataSource, since you can copy all the values from the Grid into Excel). Also, to make things a little more interesting, insert another row in the middle with the values CNY,USD,4.
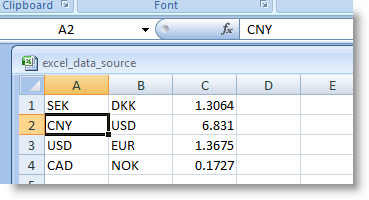
Now save and specify the file in SoapUI. Click the Run button in the DataSource window to see that the same values are returned (shown in the log at the bottom of the DataSource editor):
Now when you run the TestCase, it fails at the newly inserted row, but instead of correcting this open the TestCase Options dialog (from the TestCase toolbar) and uncheck the Abort on Error option. When you run the TestCase that step still fails but SoapUI will continue running through the other rows:
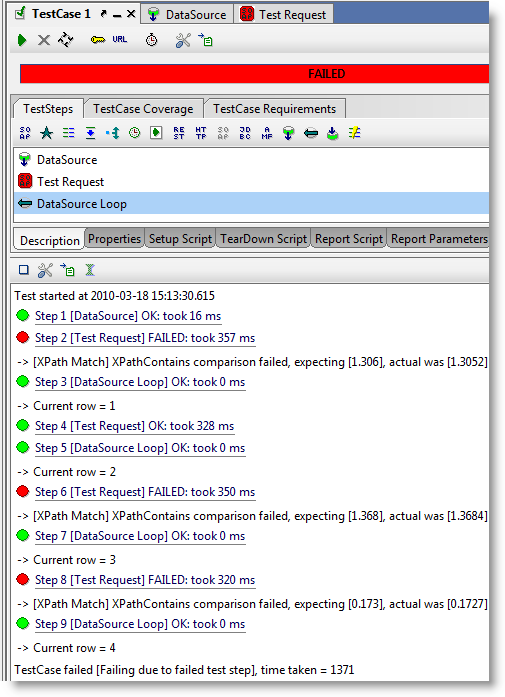
This is a common scenario when doing DataDriven tests, you don't want the test to stop at the first failing row but instead still process all rows.
Finally, select the Create Report button from the toolbar and specify a folder for export (select JUnit Style HTML Report), resulting in the following in your browser:
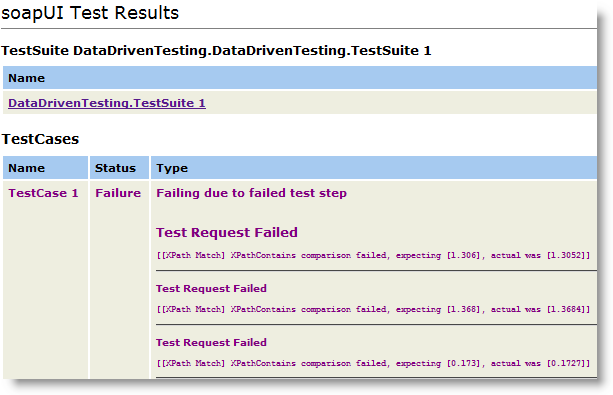
Thats it! Your first Data-Driven test went like a breeze, well done! Now move on by reading about DataDriven Load Testing or just dig more into the different DataSource options, in any case we hope this got you started as expected. And for your reference, here are the two files;
- datadriven-test-soapui-project.xml - project file
- datadriven.xls - excel file
Save these to a directory and import the project into ReadyAPI. Enjoy!